

Thursday, February 27, 2014
Mini haul | ♡h&m & victoria's secret♡
I haven't been buying too much lately. A few months ago I found the nicest pair of black jeans at h&m and tried them on and left them because they were $40. Well I found them there one sale, in my size for only $5 so naturally they needed to be bought. I also found this shirt thats like donut boobs. I think it's the cutest thing ever. I also repurchased Love spell body spray from Victoria's Secret. That has been the only scent I've liked for probably 8+ years. I hate hate hate sweet scents and this has the slightest hint of cherry blossom.
Tuesday, February 25, 2014
DIY vintage looking glass

Mercury glass and frosted glass are both so beautiful. They look old and vintage. I could spend all of my money on mercury glass. That's the problem; it costs so much money. Anthropologie sells so many types of little class jars and such but why the hell is a little glass jar $89?! I figured there had to be a way to do it myself so after testing out a few different techniques, (some worked some well they're not this post) I found such an easy way to do it. Depending on how you do this they may turn out differently. Some have turned out looking like mercury glass others look frosted. Best thing is that you probably already have most of the supplies.

You will need:
• Cleaned out candle jars- if you don't know how to clean them out, I have a quick and easy way to do this here
• Metallic spray paint and flat spray paint
• Hairspray

First I coated the entire inside of the jar with a thin layer of sliver metallic spray paint.

Next, at random I sprayed hair spray. You want to do this while the spray paint is still wet. The alcohol in the hairspray will break apart the paint and give that chipped and spattered look.

After you spray it, tip the jar over and shake it to get out the excess paint and hairspray.

For the second one, I coated it with flat white spray paint.

Then I repeated the silver layer and hair spray to the inside.

I wanted the outside of the jars to be coated as well. I tipped them upside down, to drain out the excess again and to coat all parts of the jars. I repeated the whole process of spraying with flat white, metallic sliver, and hairspray.

Finally, let the jars sit out for about ~30 or until they are completely dry.
Friday, February 21, 2014
NYC fashion week OOTD
It's been a boring week. It snowed every other day here in not so sunny NYC. I love New York but the winters are brutal. I bought rain boots and let me tell you; that those things have saved my life and feet. It was fashion week here in New York City which I spent in class. (I read through every fashion bloggers' account of fashion week in class.)
So here's what I wore inside. Outside you can find me as a walking marshmallow of warmth.

 By the way, the Hudson river in the middle of winter is, I swear, the most beautiful thing ever. The way the whole thing ices over then cracks and melts. Then all thats left is chunks of ice and snow just floating there. Plus the mountains are just breathtaking. I will always love the city but, sometimes the rest of the state is pretty cool too.
So here's what I wore inside. Outside you can find me as a walking marshmallow of warmth.
Sweater: H&M | Jeans: Bullshead | Sneakers: Converse | Beanie: Necessary Clothing | Messy bedroom/mirror selfie: DIY
By the way, the Hudson river in the middle of winter is, I swear, the most beautiful thing ever. The way the whole thing ices over then cracks and melts. Then all thats left is chunks of ice and snow just floating there. Plus the mountains are just breathtaking. I will always love the city but, sometimes the rest of the state is pretty cool too. Wednesday, February 19, 2014
Best ELF products: face brushes

I love ELF. Almost all of their products are either $1 or $3. There brushes are some of the best. They're all so soft and absolutely great. Here are my favorites.

▷1. Powder brush. This is such a great brush. Like the name suggests, you can use it to put on powder but, I find this great for buffing in liquid foundation. I've had this for years and it doesn't disappoint. The flat top is perfect for really creating a smooth looking surface.
▷2. Stipple brush. It can be used with both cream/liquids and powders. I use it for foundation, cream blush or if I want to wear just powder. This adds a sheer wash or color or product.
▷3. Blush brush. This is a good one for either powder blush or powder contour. This is a flatter brush that comes to a point.
▷4. Complexion brush. Can you tell I loved this one? I bought this around the time that ELF created the studio brush line. My dog has chewed the handle and the paint has chipped. I really can't say why I haven't just picked up a new one; it costs $3. This brush is so great. It so so soft and again its flat. You can use it for powder or bronzer or anything at all. If I could only recommend on brush it would be this one.
Sunday, February 16, 2014
Long hair care routine
My most popular post ever was my post about how I grew out my hair so long. If you haven't seen that, you can find it here. In that post, I gave a few simple tips and tricks to get really long hair. I want to do a follow up with the products I use to care for my long hair. I also wanted to give one tip and that is: DON'T BELIEVE ANYTHING THAT SAYS YOU CAN GROW YOUR HAIR 3 INCHES IN A WEEK. Seriously your hair grows at one speed and there is no magic oil you can use to make it grow.
In that post I said that I don't really ever wash my hair. Normally it gets washed about once to twice ish a week. I used to go about 3 days until I found the best dry shampoo ever.

I'll admit that I have some really dry skin and that includes my hair. Each time I wash it, I first use the tresemme platinum strength shampoo. This stuff is supposed to repair your hair but even if it doesn't do that, I still think its nice. Plus it has a pump on it so that just makes things about a million times better. Then I use head and shoulders.
I actually do lather, rinse, repeat. If you're someone who washed their hair infrequently or uses a ton of products, I really do suggest doing this. The first wash gets all the product buildup out and the second gets down into your scalp and cleans that and your hair.

I focus my shampoo in my roots and just let it rinse down the length of my hair.
Head and shoulder work really well if you have dry scalp or dandruff problems. It smells not that great but I don't have a problem with that.
 For conditioner, I use the tresemme platinum strength deep conditioner. I will only use deep conditioners on my hair since they're much thicker and tend to work better.
My hair is the first thing I wash in the shower so following it with conditioner and, leaving that conditioner on for the rest of the shower helps it really sink in.
I think this makes a difference in the softness of my hair and keep it from breaking so much.
 I swear by this suave keratin infusion. This is a leave in conditioner that makes your hair so soft and prevents it from breaking. The best thing is that it costs like $3.
It has a bit of shimmer in it that makes you hair look healthy and shiny in the light without it looking stringy or greasy.
 Finally, dry shampoo. A must have for oily hair girls. My hair is so complicated. My hair is oily but my scalp is dry. The batiste dry shampoo is a must. I used to be a huge fan of the garner fructose one. I thought that added a ton of volume but this is better. I love that this has a tint for dark hair. I found mine at Marshall's for around $5 but it can be pricey.
This stuff freaked me out at first because, when I showered, the water was running brown. I was thinking "how am I this dirty?" but in fact it was this tinted dry shampoo coming out haha.
Dry shampoo can make your hair look dull and leave a bit of a white cast in it so using one that;s colored for your hair is great.
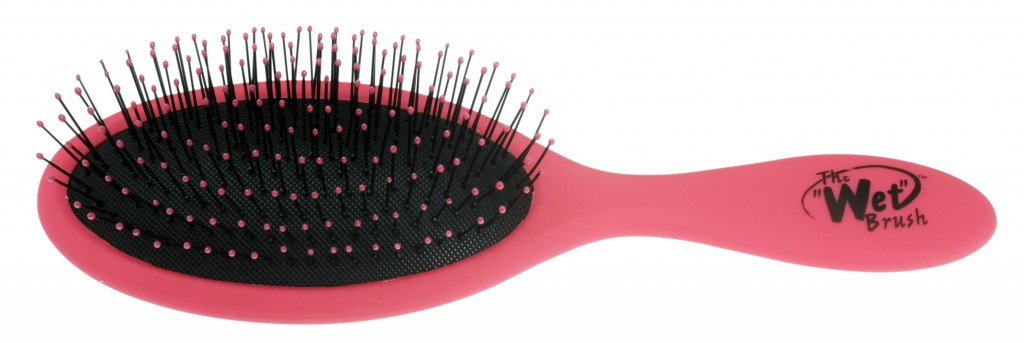 The wet brush. I thought this was going to be a total gimmick. It looks and feels just like every other brush. So what's different? I have no idea but this makes brushing your hair so easy. I can start at the top of my head and brush all the length of it in one swoop and it goes through like butter. I really can't explain this because you have to just try it for yourself. Btw I wanted to show you my actual one but it looked nasty so here's a googled image instead.
In that post I said that I don't really ever wash my hair. Normally it gets washed about once to twice ish a week. I used to go about 3 days until I found the best dry shampoo ever.
I'll admit that I have some really dry skin and that includes my hair. Each time I wash it, I first use the tresemme platinum strength shampoo. This stuff is supposed to repair your hair but even if it doesn't do that, I still think its nice. Plus it has a pump on it so that just makes things about a million times better. Then I use head and shoulders.
I actually do lather, rinse, repeat. If you're someone who washed their hair infrequently or uses a ton of products, I really do suggest doing this. The first wash gets all the product buildup out and the second gets down into your scalp and cleans that and your hair.
I focus my shampoo in my roots and just let it rinse down the length of my hair.
Head and shoulder work really well if you have dry scalp or dandruff problems. It smells not that great but I don't have a problem with that.
My hair is the first thing I wash in the shower so following it with conditioner and, leaving that conditioner on for the rest of the shower helps it really sink in.
I think this makes a difference in the softness of my hair and keep it from breaking so much.
It has a bit of shimmer in it that makes you hair look healthy and shiny in the light without it looking stringy or greasy.
This stuff freaked me out at first because, when I showered, the water was running brown. I was thinking "how am I this dirty?" but in fact it was this tinted dry shampoo coming out haha.
Dry shampoo can make your hair look dull and leave a bit of a white cast in it so using one that;s colored for your hair is great.
Thursday, February 13, 2014
Healthy and easy homemade ice cream- only 2 ingredients
Everyone made their New Year's resolution to eat healthier right? And you could totally handle until you found some ice cream in the freezer and binge ate the entire carton while watching The Notebook. I have a really easy recipe that only requires 2 ingredients. I'm not saying this is necessarily healthy but that may depend on your take of healthy food. This is not clean or raw or vegan or anything like that but its so much better than Ben and Jerrys (sorry I know I love them too) or Breyers. It takes similar to ice cream or gelato.
You're only going to need frozen fruit (I think mango works the best) and cool whip. You can use the fat free or any variation of it.
 Take them out of the freezer and let them soften just a little.
Next throw these into your Nutribullet/blender/food processor. I use my nurtibullet but any kitchen gadget of this type will work. Add one heaping tablespoon of cool whip per handful of mango.
Blend it, scraping the sides often. You can blend this for longer if you want is really smooth or for less if you want a few chunks in it. 30 seconds give or take will be fine.
Throw the mixture back in the freezer for a few minutes. While the fruit is being blended I find it sometimes thaws a bit too much.
Now enjoy your healthier whipped fruit dessert. Feel free to add some chopped nuts or any other healthy topping.
*note I do not own the images in this post.
You're only going to need frozen fruit (I think mango works the best) and cool whip. You can use the fat free or any variation of it.
Next throw these into your Nutribullet/blender/food processor. I use my nurtibullet but any kitchen gadget of this type will work. Add one heaping tablespoon of cool whip per handful of mango.
Blend it, scraping the sides often. You can blend this for longer if you want is really smooth or for less if you want a few chunks in it. 30 seconds give or take will be fine.
Throw the mixture back in the freezer for a few minutes. While the fruit is being blended I find it sometimes thaws a bit too much.
Now enjoy your healthier whipped fruit dessert. Feel free to add some chopped nuts or any other healthy topping.
*note I do not own the images in this post.
Wednesday, February 12, 2014
♡ DIY Valentine's Day heart Wreath ♡

You'll need table scatter hearts. I used the same one from my last Valentine's day diy. Valentine's day jars. You'll also need some kind of wire and glue.

♡ Start out by tracing a circle onto something.
♡ Trace this onto something sturdy. I used a paper bag. You're going to be gluing around this.

♡ Grab your hearts and lay them out around the circle. This will ensure that your wreath lies flat and looks perfect.
♡ Doing this will also help you to create your pattern and make sure that it will fit the way you want it to.
♡ As you can see, I alternated red to pink and overlapped them.

♡ Once you've laid them out, begin gluing.
♡ Glue a piece then the next one.
♡ You will wind up with a floppy circle of hearts. They will be all connected though.

♡ I found it easiest to bend the wire into a perfect circle that fit around the wreath.
♡ After that, I cut the wire into 4 parts. This makes it so much easier to glue.
♡ Don't worry if it looks messy. The wire is on the back and it will never be seen.
♡ Finally you can attach it to the wall. Sine the hearts have a naturally pointed gap in between, I slipped it over a nail but you could use some ribbon instead.
Monday, February 10, 2014
Nars orgasm/laguna Vs. Elf contouring blush and bronzing powder
Nars makes awesome makeup. I haven"t tried too many things from them just because it is so pricey. That being said there was one thing I couldn't"t pass up: the Orgasm/Laguna duo. If you haven't heard of this, its a blush and bronzer duo that's widely popular. Its so popular that the brand ELF of Eyes Lips Face made a dupe of this.
I was using the the ELF one for probably close to 3 years when I decided I wanted to see what all the hype was about on the Nars one. I have been using solely this one since August and I can say that I think the two are very similar but I wouldn't call it a dupe.
This is a comparison of the two. I've divided it into a few categories. note: the nars one is a mini size, not the full sized version.
Packaging:

 The two look very similar. The Nars one is smaller but that is because it is a mini. The Nars one has larger lettering. If you've ever felt Nars packaging, you know that is has an almost rubbery feel to it. The ELF one has a much more plastic feel. Its pretty clear that ELF was going after Nars when making this.
As you can tell, I used a lot of the Elf bronzer. I do actually prefer this to the Nars one because it's darker. The colors all look very different in the packaging.
Also the pans for the elf one are rounded while Nars' are squared off.
Look of the colors- Blushes:
 On the right I have the Elf blush swatched. On the left is Nars orgasm. The elf one is a bit more powdery and orange toned while the Nars one is more pink. Both are shimmery blushes. They both have a golden shimmer.

Look of the colors- Bronzer:
On the left is the Nars laguna bronzer and on the right is the elf bronzer. These are both shimmery bronzers with a golden undertone. Just like with the blushes, the elf one is a bit more chalky. The Nars one goes on a bit more smoothly. (note that at the top of the nars swatch is a freckle not part of the swatch) Laguna is a lighter color that the elf one.
Price:
The elf one retails at $3 and can be purchased at eyeslipsface.com | Target | Walmart | K-mart. The Nars duo can be purchased for $24 for the mini (shown in this post) or $41 for the larger one. It can be purchased from sephora or from Nars directly.
I was using the the ELF one for probably close to 3 years when I decided I wanted to see what all the hype was about on the Nars one. I have been using solely this one since August and I can say that I think the two are very similar but I wouldn't call it a dupe.
This is a comparison of the two. I've divided it into a few categories. note: the nars one is a mini size, not the full sized version.
Packaging:
As you can tell, I used a lot of the Elf bronzer. I do actually prefer this to the Nars one because it's darker. The colors all look very different in the packaging.
Also the pans for the elf one are rounded while Nars' are squared off.
Look of the colors- Blushes:
Look of the colors- Bronzer:
On the left is the Nars laguna bronzer and on the right is the elf bronzer. These are both shimmery bronzers with a golden undertone. Just like with the blushes, the elf one is a bit more chalky. The Nars one goes on a bit more smoothly. (note that at the top of the nars swatch is a freckle not part of the swatch) Laguna is a lighter color that the elf one.
Price:
The elf one retails at $3 and can be purchased at eyeslipsface.com | Target | Walmart | K-mart. The Nars duo can be purchased for $24 for the mini (shown in this post) or $41 for the larger one. It can be purchased from sephora or from Nars directly.
Friday, February 7, 2014
OOTD: ripped denim
I did a post all about the ripped denim trend and I love this trend so much. I put together a little outfit of the day. I wound up taking some mirror selfies. Come on we all have them. No shame. Oh and say hello to my little nugget dog.


Denim: forever 21 | Sweater: thrifted | Choker necklace: H&M | Booties: Betsey Johnson natasha (exact link) | Messy room: all mine
Tuesday, February 4, 2014
Pantone color of the year fashion and makeup


Saturday, February 1, 2014
Trend report: dressed up ripped jeans

I love this trend because its no longer a casual piece. I love these with heels and leather jackets and a pop of color on a leather bag.

This is something great because you can still wear these while it's cold and winter is ending but they can't be transitioned into spring. I, myself love normal ripped denim but simple black ones are super chis too. I think my ultimate pair or ripped jeans would be skinny, black, and ripped just on each knee. I'm still on the hunt for a pair of those.
Let me know what you think of this not so new trend.
*I do not own any of these photos
Subscribe to:
Posts (Atom)